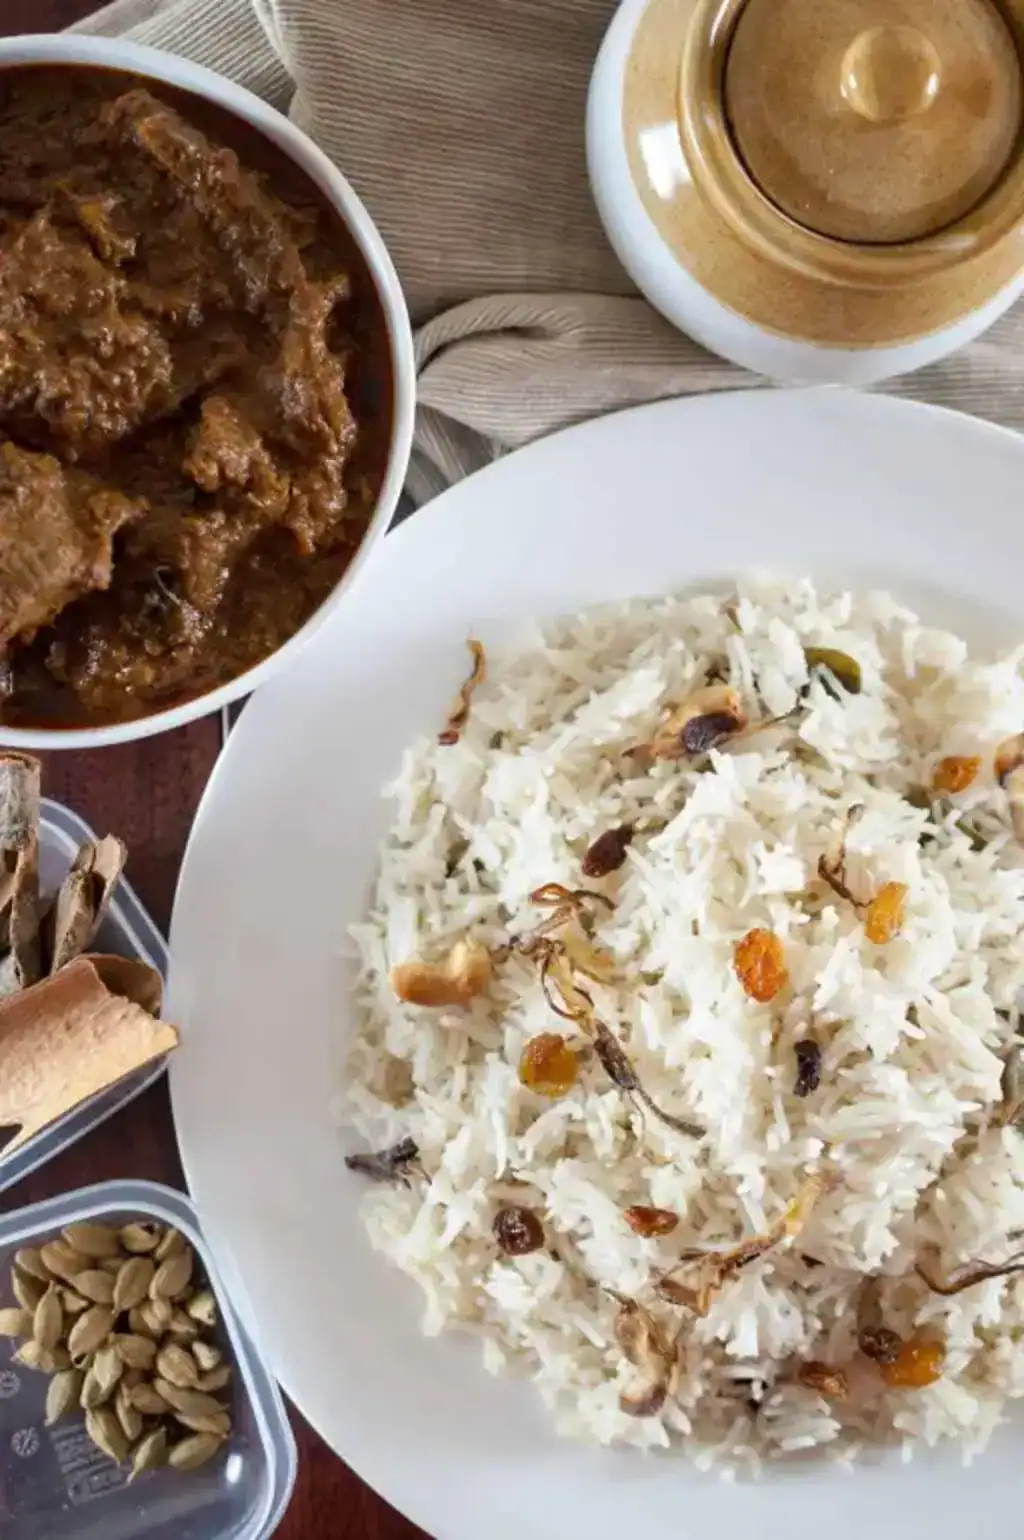
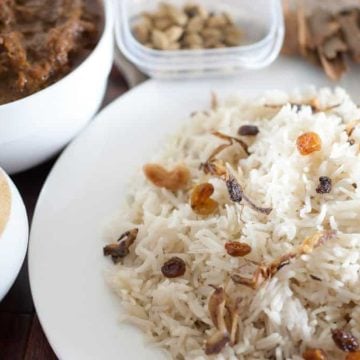
Kerala Style Ghee Rice (Ney Choru) is a rich, ghee-based rice from Malabar, gently cooked with whole spices and topped with golden fried onions, raisins, and cashews. It’s often paired with curries, but also served plain to kids or elders who avoid spicy food.
This dish was once a special meal for Friday lunches after Jumah prayers and festive gatherings in many northern Kerala homes. Over time, it became a familiar comfort across the state, loved for its aroma and simplicity.
The recipe is quick and easy, but the rice-to-water ratio matters. We'll guide you with the right measurements, ingredients, cooking steps, side pairings, and storage tips to help you make it perfectly.
Jump to:
- What is Kerala Style Ghee Rice?
- Why You'll Love This Recipe?
- Recipe Ingredients
- Variations to Try
- How To Make Kerala Style Ghee Rice? (Step-by-Step Guide)
- Tips And Tricks
- Serving Suggestions
- Storage Instructions
- Frequently Asked Questions (FAQ)
- More Kerala Rice Recipes To Try
- Kerala Style Ghee Rice (Ney Choru)
What is Kerala Style Ghee Rice?
Kerala Style Ghee Rice is a rice dish made by boiling kaima or jeerakasala rice with sautéed onion, whole spices, cashews, and raisins in ghee. The rice cooks up soft but never sticky. Each grain stays separate. It is lightly glossed with ghee and carries the fragrance of whole spices.
The first thing you smell is ghee. Then comes the warm aroma of cardamom, clove, cinnamon, star anise, aniseed, and bay leaf. The scent of rice blends in slowly and ties everything together.
The rice looks white, glossy, and soft. Fried onions, cashews, and raisins sit on top. They bring texture, contrast, and balance to the plate.
The taste is warm and satisfying. Ghee coats each grain gently. Cashews add crunch. Onions bring depth. Raisins offer small sweet bites. Each element adds a different flavour to every mouthful.
Kerala has many rice dishes like curd rice, lemon rice, and pulao. Other regions have Arabic rice, sticky rice, and more. But this one feels different. It follows a method and taste that belong to Kerala.
This same rice is also used in Malabar-style biriyanis. Once cooked, it is layered with masala to complete the dish. You can see the full method in our Kerala Style Chicken Biriyani recipe.
Why You'll Love This Recipe?
You’ll love this recipe for its simplicity, ease, and taste. With the right measurements, it gives off the true aroma of kaima rice infused with ghee and whole spices. Paired with a curry, it completely transforms the meal. The rice soaks up the gravy and lifts every bite to the next level.
Recipe Ingredients
- Rice:
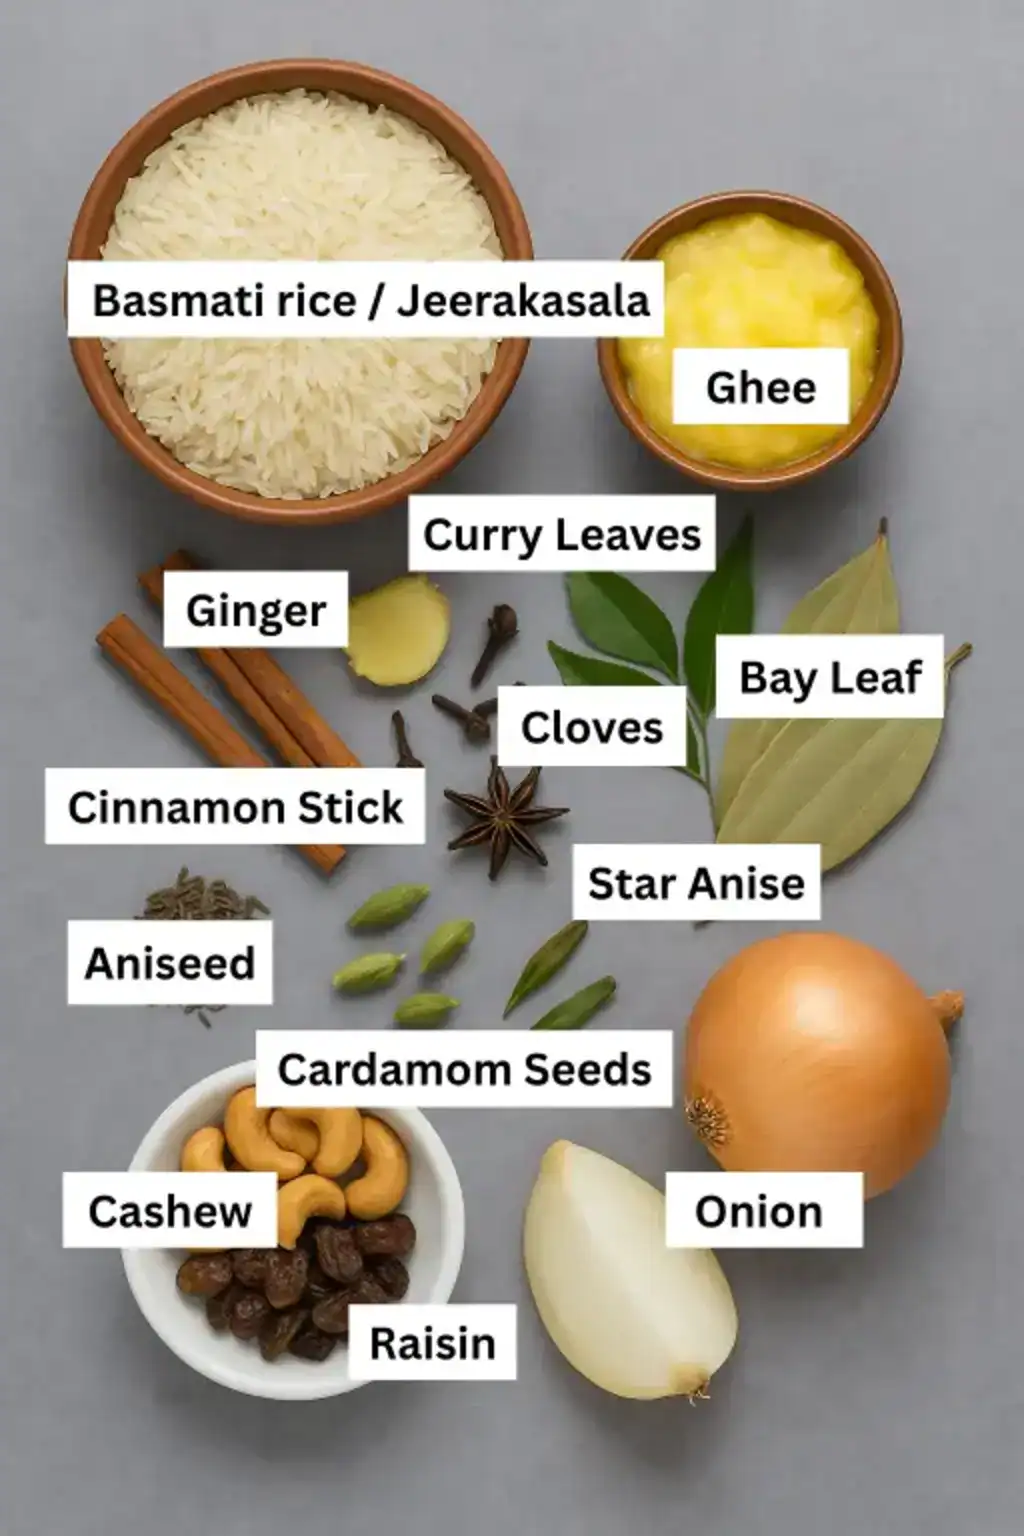
Kaima or jeerakasala rice is the best choice for this dish. This small, aromatic rice is unique to Kerala and very different from long-grain basmati. You can use basmati if needed, but it won’t give the same taste or texture. - Whole spices:
Cardamom, clove, cinnamon stick, star anise, aniseed, and bay leaf. When these bloom in hot ghee, they release that signature fragrance. - Ghee:
This is the heart of the dish. Ghee is clarified butter with a rich, deep flavour. Today, we buy it from stores. But in Kerala, we used to make butter at home and melt it into ghee. That taste is hard to match. - Other essentials:
Sliced onion, cashew nuts, raisins, water, and salt. All ingredient quantities and nutritional details are listed in the recipe card below.
If you enjoy traditional Kerala rice dishes, don’t miss our guide on how to make soft, lace-edged Kerala Style Appam.
Variations to Try
Whole spices can be skipped if you’re cooking for kids or anyone who doesn’t enjoy biting into them. The dish still turns out tasty, but it loses that deep, traditional aroma.
Sliced carrots can be added after sautéing the onions and before blooming the spices. This gives a light sweetness and a slight variation in texture. Some also add pineapple for a sweet twist that pairs surprisingly well with mild curries.
You can pressure cook the rice for speed. One or two whistles are enough. Just reduce the water slightly to avoid overcooking.
To balance richness, you can mix ghee with palm oil. The rice still turns out soft and glossy, without feeling too heavy.
How To Make Kerala Style Ghee Rice? (Step-by-Step Guide)
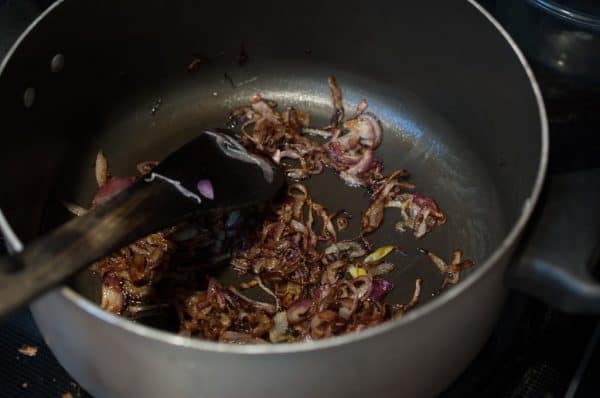
STEP 1: Prepare garnish - Thinly slice the onion into uniformly-shaped pieces. Heat the ghee in a pan. Fry the sliced onions until golden brown. Sprinkle salt and a bit of sugar while it's frying. Drain and remove it.
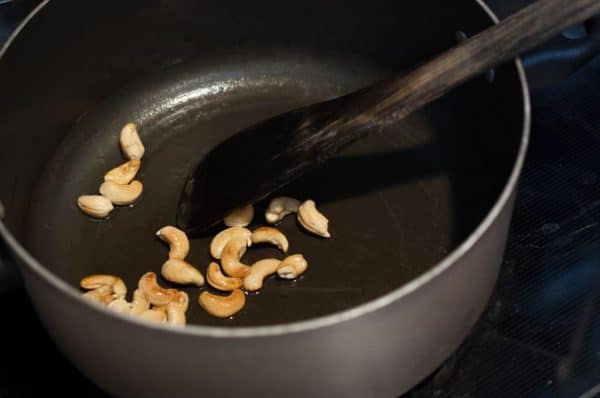
STEP 2: In the remaining ghee, fry cashews and raisins, drain and remove them, and keep them aside.
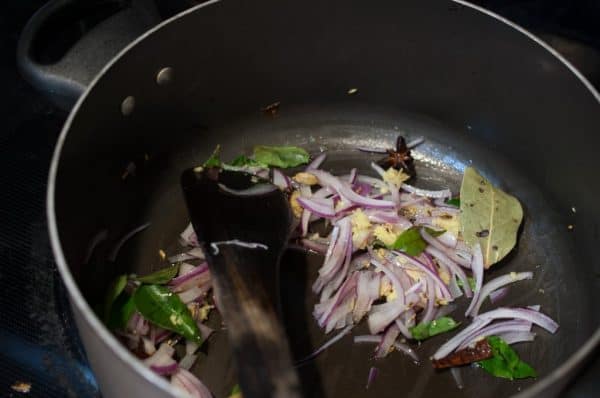
STEP 3: Prepare rice - Wash and drain the rice. Slice the onion. Crush the ginger. Heat the ghee in the same pan. Add the spices - aniseed, cinnamon, star anise, cloves, cardamom seeds, and bay leaf. Sauté for a couple of minutes until the spices get roasted.Then add sliced onion, curry leaves, and ginger. Sauté it well.
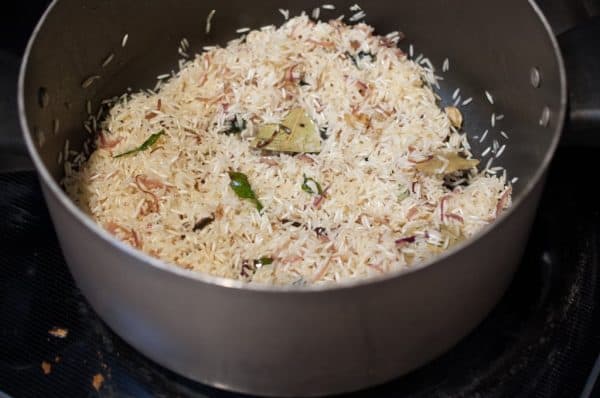
STEP 4: Once the onion turns light brown, add the cleaned rice. Add extra ghee if needed. Fry the rice so that it won't stick much once cooked. Sauté it till the rice is crispy.
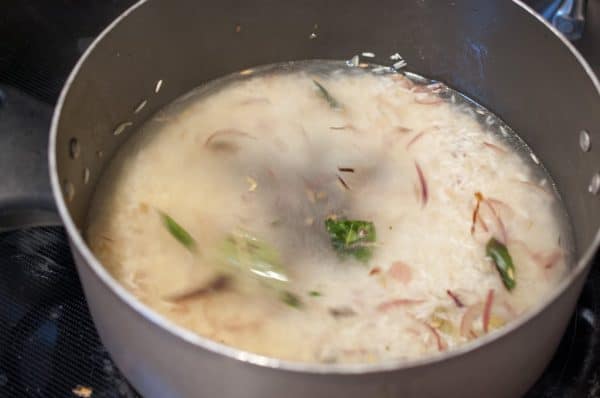
STEP 5: Meanwhile, boil water in another pan. Add enough salt to it. Once it is boiled, add it to the fried rice. Cover and cook. It might take around 10 - 15 minutes. Once the water level drops just below the top of the rice, switch off the flame and keep the lid closed for another 15 minutes. It would be done by that time.
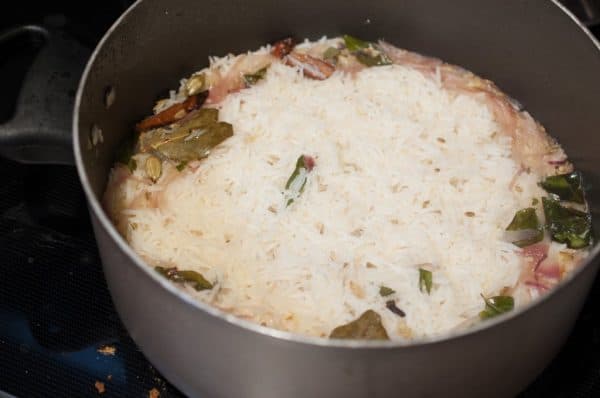
STEP 6: Pour over 1 teaspoon of ghee at the end. Fluff the rice and garnish with fried onions, cashews, and raisins.
You can also try our step-by-step recipe for soft and Steamed Kerala Puttu as your next dish.
Tips And Tricks
- Don’t let kaima or jeerakasala rice sit too long after washing. It absorbs water quickly and can throw off the cooking ratio.
- Avoid stirring the rice constantly. The grains are delicate and can break easily.
- Add a small squeeze of lemon juice to the boiling water before adding rice. It helps prevent clumping.
- When increasing the quantity of rice, reduce the total water slightly to avoid overcooking.
- Let the rice rest after cooking. This helps set the texture and keeps it from turning sticky.
Special tip: Layer this Ney Choru with our Kerala Style Prawns Masala to make a quick Nadan Chemeen Biriyani at home.
Serving Suggestions
Ney Choru holds its own flavour, even when served with rich curries. At the same time, it soaks up the gravy, making each bite more balanced and satisfying. That’s what makes it such a perfect base.
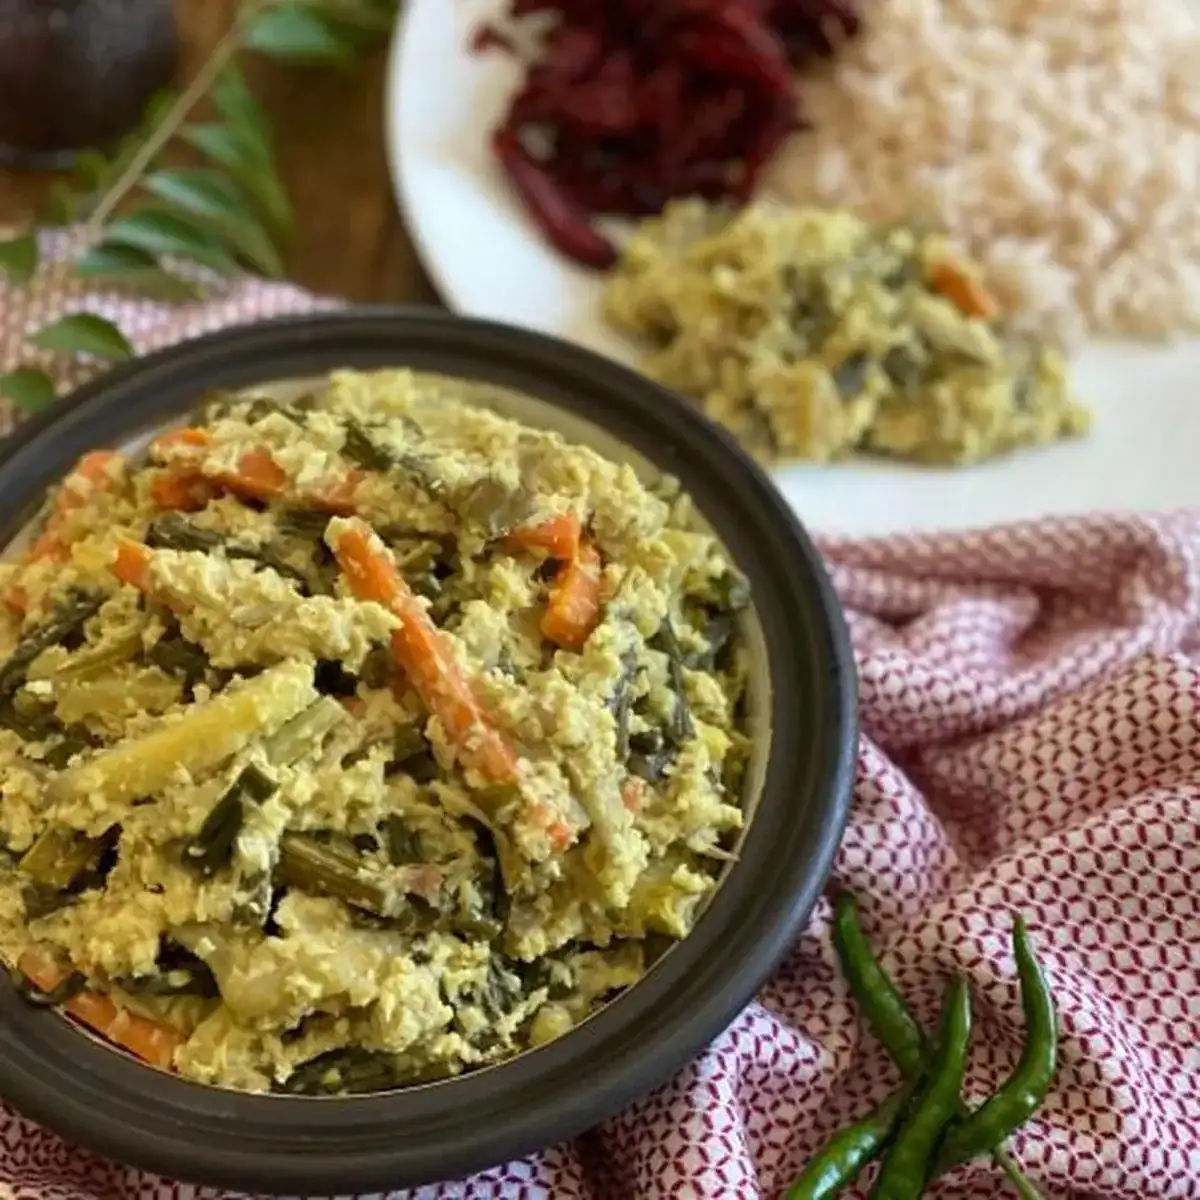
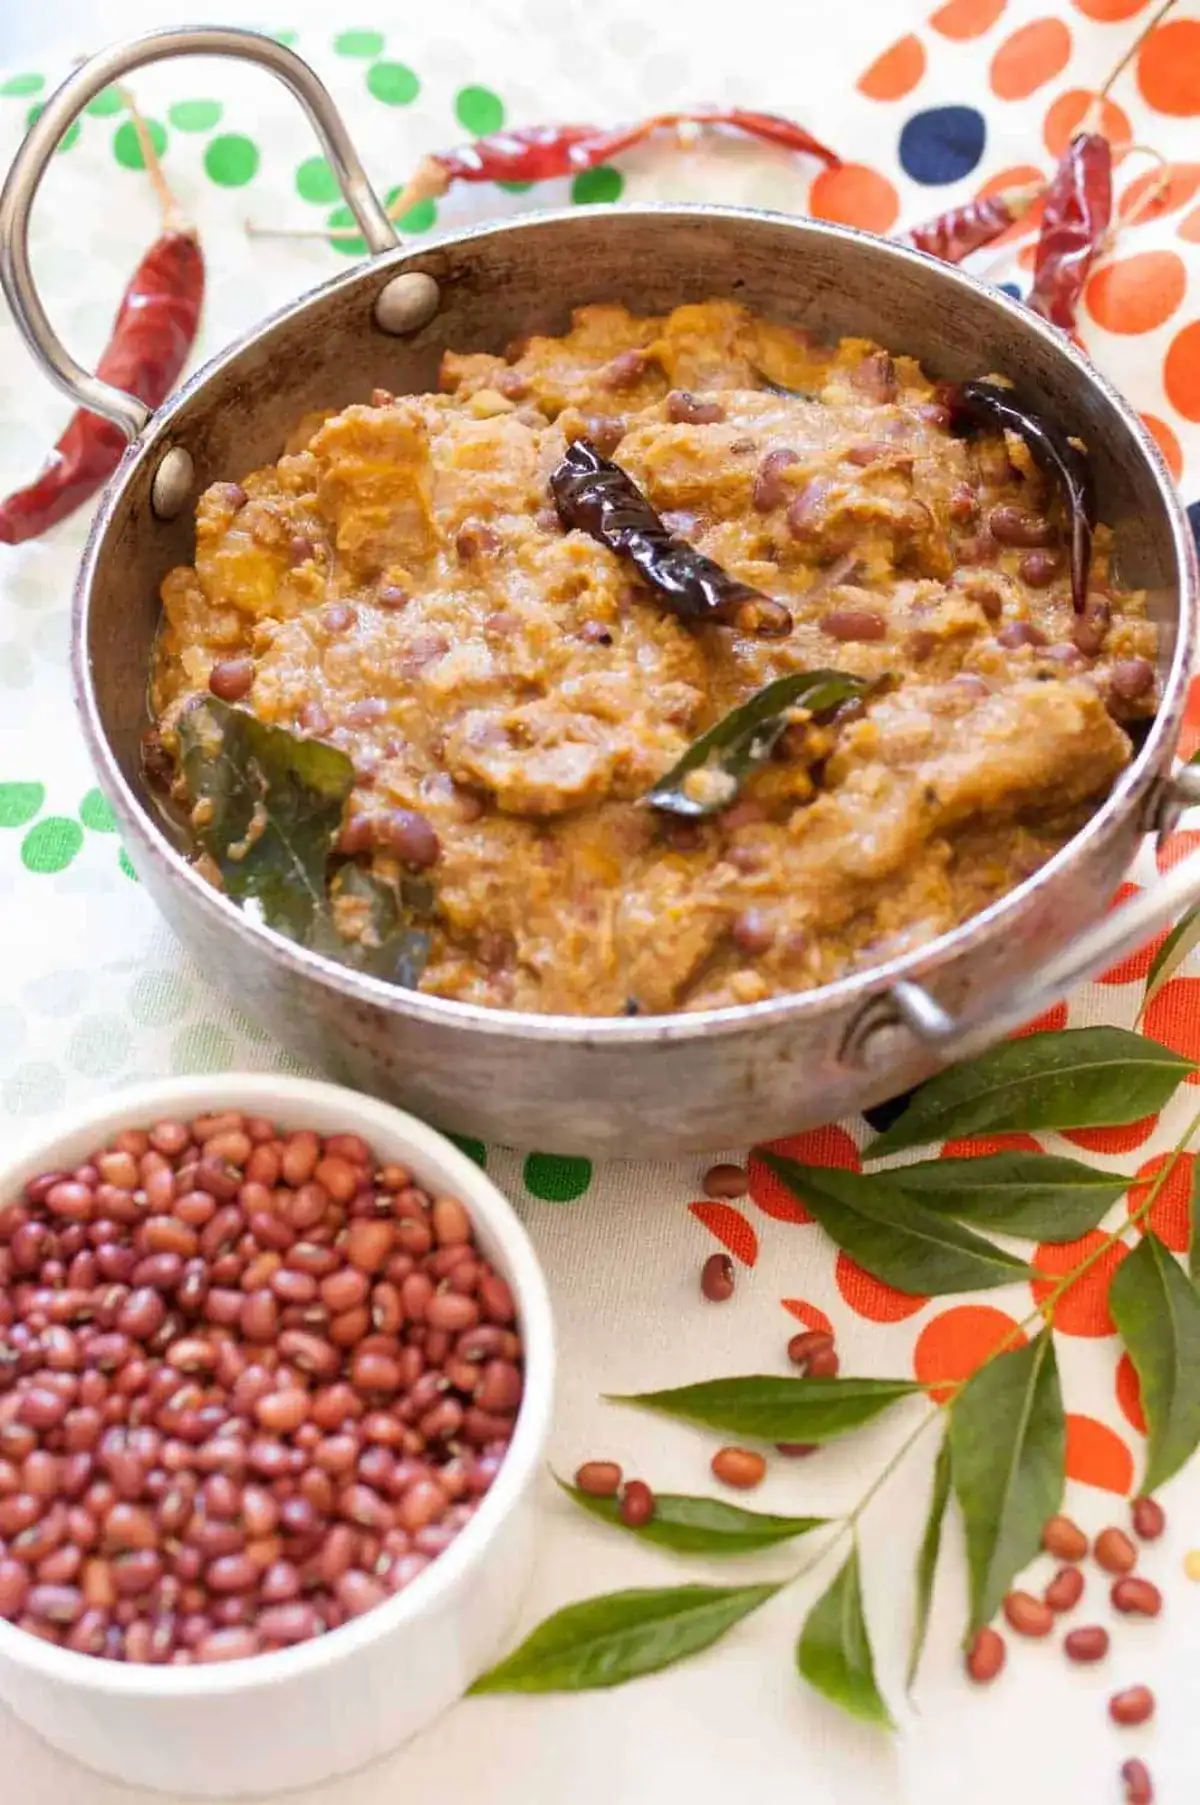
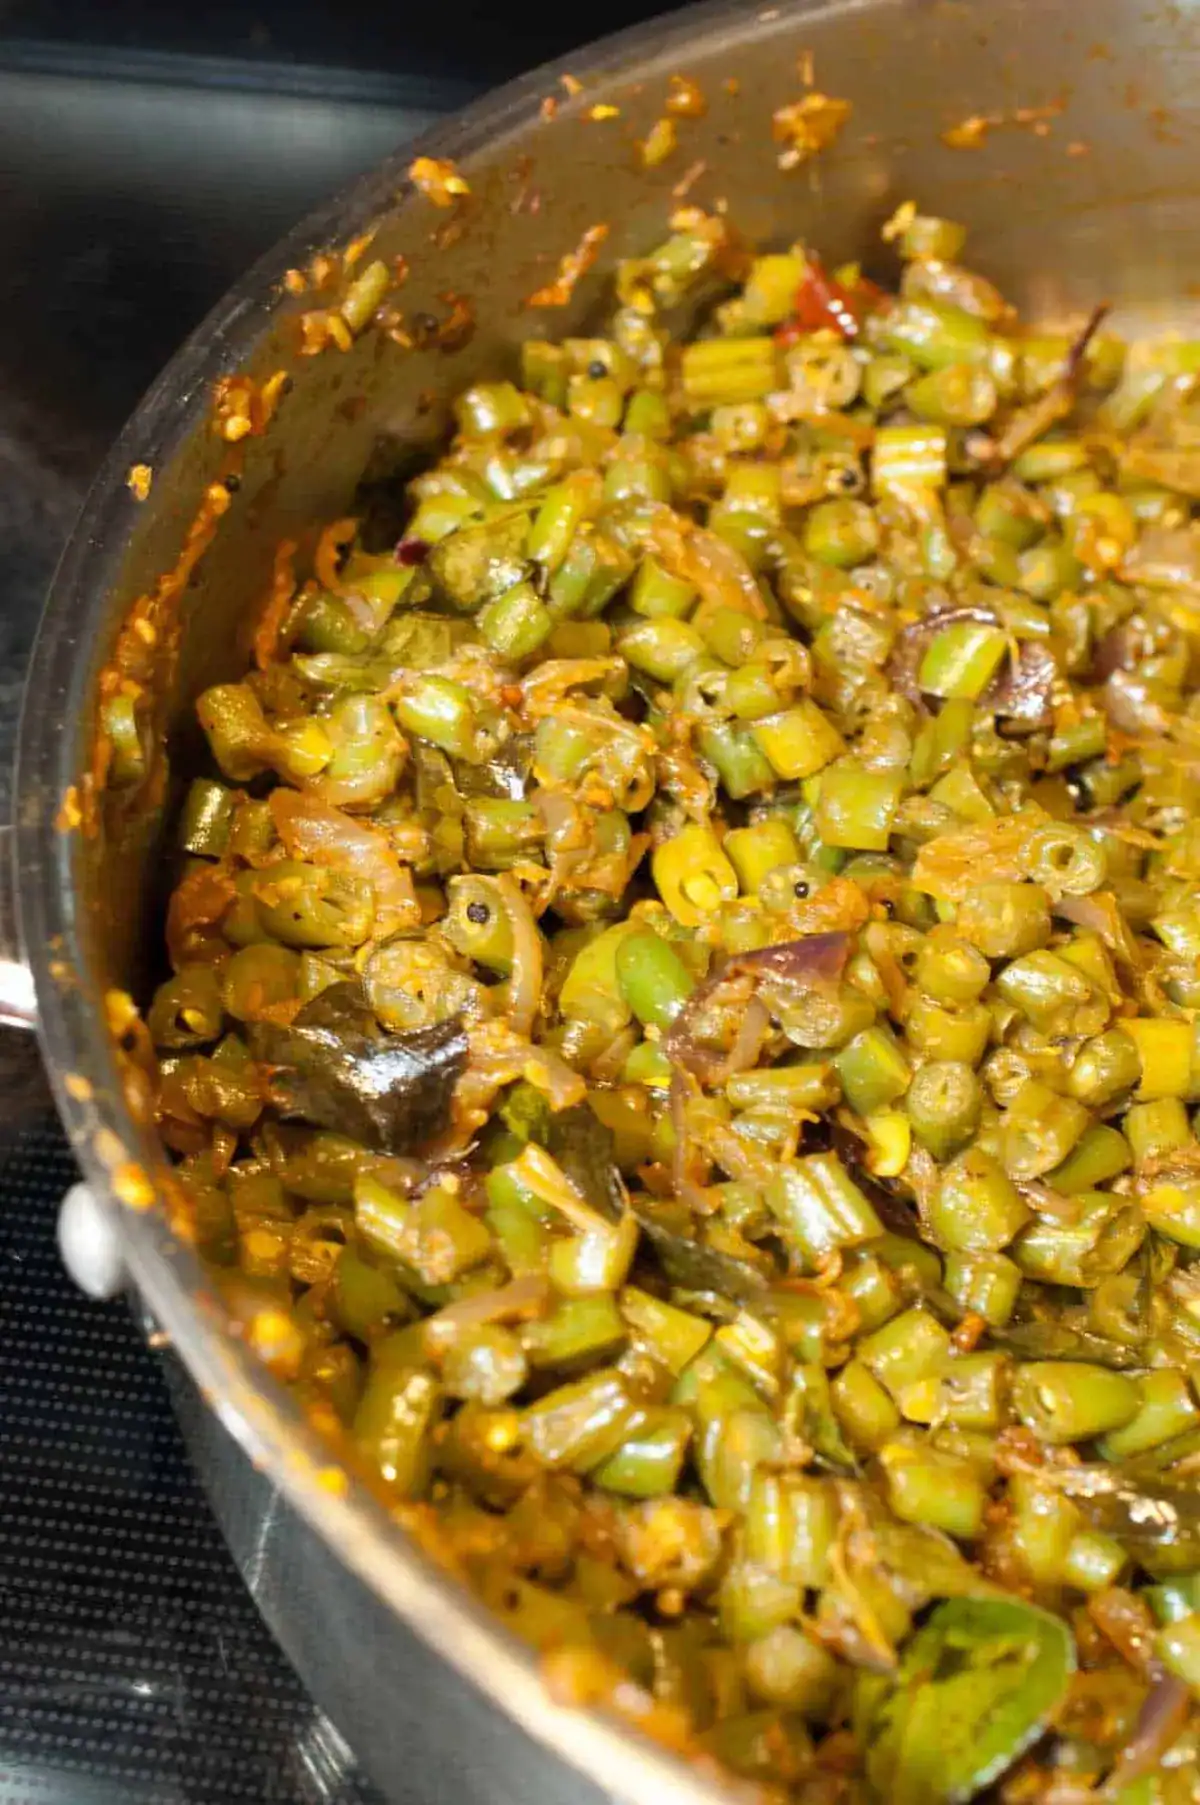
It pairs beautifully with Kerala-style non-veg curries. Spicy gravies like Nadan Kozhi Curry bring heat and depth. Coconut-based dishes like Mutton Stew or Varutharacha Chicken Curry add richness. Roasted sides like Beef Ularthiyathu or Chicken Fry give contrast and texture.
This same Ney Choru is also used as the rice base in Malabar-style biriyanis. The cooked rice is layered with masala to build deep flavour.
Another well-loved combination in Malabar is Ney Choru served with parippu, beef roast, or Nadan Chicken Roast. This isn’t just a meal. It’s a regular comfort on the plates of many Kerala homes.
Storage Instructions
Kerala Style Ghee Rice (Ney Choru) stores well because of its ghee content. It is often packed for travel or used as a next-day meal.
You can keep it in a clean, airtight container in the fridge for 2 to 3 days. Freezing is also possible, but not recommended, as the texture and aroma may change.
To reheat, use a steamer or microwave. Add a few drops of water while reheating to bring back softness.
Frequently Asked Questions (FAQ)
It usually happens when the rice is over-soaked or too much water is used. Stirring while cooking can also break the grains. And if you skip the resting time after cooking, the rice won’t set right. That final steam is what keeps Ney Choru fluffy.
Most likely, there wasn’t enough water or the heat was too high. The rice needs steam to cook through gently. If the lid wasn’t tight or you skipped the resting time, the grains won’t soften fully.
More Kerala Rice Recipes To Try


I’d love to hear your thoughts if you have tried this! Please leave a ⭐️ rating and a comment below. Don’t forget to share your photos on Instagram and tag @a_little_bit_of_spice.
Kerala Style Ghee Rice (Ney Choru)
Ingredients
- 2 cups basmati rice Jeerakasamba/
- 2 ½ tablespoons ghee
- 1 teaspoon Aniseed
- 2 numbers cinnamon (1" stick)
- 1 number Star Anise
- 4 numbers Cloves
- 3 numbers Cardamom Seeds
- 2 numbers Bay Leaf
- 1 sprig curry leaves
- ½ cup onion (sliced)
- ½ teaspoon ginger
- 4 cups water
- salt
Garnish
- 1 ½ tablespoons ghee
- 2 tablespoons cashew
- 2 teaspoons raisin
- 1 number onion (medium)
Instructions
- Prepare garnish - Thinly slice the onion into uniformly-shaped pieces. Heat the ghee in a pan. Fry the sliced onions until golden brown. Sprinkle salt and a bit of sugar while it's frying. Drain and remove it.
- In the remaining ghee, fry cashews and raisins, drain and remove it and keep it aside.
- Prepare rice - Wash and drain the rice. Slice the onion. Crush the ginger. Heat the ghee in the same pan. Add the spices - aniseed, cinnamon, star anise, cloves, cardamom seeds, and bay leaf. Sauté for a couple of minutes until the spices get roasted. Then add sliced onion, curry leaves, and ginger. Sauté it well.
- Once the onion turns light brown, add the cleaned rice. Add extra ghee if needed. Fry the rice so that it won't stick much once cooked. Sauté it till the rice is crispy.
- Meanwhile, boil water in another pan. Add enough salt to it. Once it is boiled, add it to the fried rice. Cover and cook. It might take around 10 - 15 minutes. Once the water level drops just below the top of the rice, switch off the flame and keep the lid closed for another 15 minutes. It would be done by that time.
- Pour over 1 teaspoon of ghee at the end. Fluff the rice and garnish with fried onions, cashews, and raisins.
Notes
- Don’t let kaima or jeerakasala rice sit too long after washing. It absorbs water quickly and can throw off the cooking ratio.
- Avoid stirring the rice constantly. The grains are delicate and can break easily.
- Add a small squeeze of lemon juice to the boiling water before adding rice. It helps prevent clumping.
- When increasing the quantity of rice, reduce the total water slightly to avoid overcooking.
- Let the rice rest after cooking. This helps set the texture and keeps it from turning sticky.
All time favorite.beautiful images.
Thanks Suji :)
Ie
I will try this next time.
Let me know whether you like it :)